Insert an image in text
In the last tutorial, we have discussed Inverting colours in an image. A simple technique of inverting the colours of an image just by clicking "Invert" option after selecting the image on which we would like to apply the effect. In this tutorial, we are going to learn about Inserting an image in text in a most classy way. It is quite typical to do but I'll try to explain you clearly about the process of editing. Okay, like all the tutorials which i have discussed earlier here also I'm going to explain with an example. Let's move on to the process of editing.
For this type of edit, I'm going to introduce you a number of features or options that are available with in the Adobe photoshop 7.0. As it is a old version one option has only a shortcut but there is no quick option held in it. I'm going tell about that option here only which is nothing but "Creating a clipping mask". This option plays a predominant role in this type of edit to make it done. let's have a brief description about that.
Clipping mask: To perform Clipping mask there should be at least two layers in the edit we do. So that the objects present in the respective layers are clipped together and masked accordingly with the underneath layer.
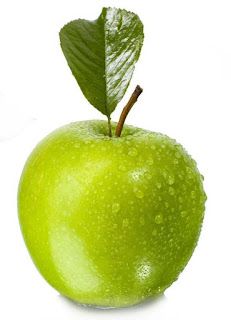
Let's move on to apply the edit with an example. Currently, there is cricket fever all over so my text is "ICC" and the which I would like to insert is shown below.

Follow these steps carefully to complete the edit
Step 1: Open the Adobe Photoshop 7.0 by double-clicking on the icon and Create a "New" layer with "1920 by 1080 dimensions" and keep "Resolution to 150" and then click "OK".

After clicking "OK", then it looks like the below screen shot.

Step 2: Now select the "Text" tool in the tools panel

and set the "font size" to "72pt", "Font style" to "Impact" and "Font colour" to "Black" then click on the Right mark on the right top corner then it looks like the below screen shot.

You can additionally make changes to your text in the text menu window positioned to the right beside navigator window.
Step 3: Open the image to insert in the text by clicking "Ctr+O" and put that image layer above the text layer as shown in the below screen shot.

Step 4: It's Time for clipping the layers. Here, I clip both the layers with the shortcut "Ctr+G". It looks like the below screen shot.

Step 5: If you are not comfortable with the edit what you did till now then you can able to change that by changing the image position and its size inside text. To do that left-click on the image layer in layers window and select "Move" tool in Tool panel and then Transform the image by applying the shortcut "Ctr+T" and re size the image in your own way. I have re sized and fixed like this as shown in the below screen shot.

If you observe in the above image there is no difference outline of the text and the background. They were merged in colour. So I would like apply the "Blending options" for the text layers as in the below screen shot.

If you observe in the above screen shot, keep tick marks for drop shadow and Stroke in the blending options menu and you can also apply additional effects to that which are available in blending options window. I have applied only the two as specified earlier and the result looks like image at the right side of the blending options window.
You can also change the background of image and I have edited it according to my taste. The final result of my edited image is shown below.

This is one type of editing and you can also apply some brush strokes to edit in a more classy way. For any queries feel free to discuss. We will discuss about them in the later on tutorials.
This editing has been dedicated to the Cricket fans all over the world.
Happy editing..!
For this type of edit, I'm going to introduce you a number of features or options that are available with in the Adobe photoshop 7.0. As it is a old version one option has only a shortcut but there is no quick option held in it. I'm going tell about that option here only which is nothing but "Creating a clipping mask". This option plays a predominant role in this type of edit to make it done. let's have a brief description about that.
Clipping mask: To perform Clipping mask there should be at least two layers in the edit we do. So that the objects present in the respective layers are clipped together and masked accordingly with the underneath layer.
Let's move on to apply the edit with an example. Currently, there is cricket fever all over so my text is "ICC" and the which I would like to insert is shown below.
Follow these steps carefully to complete the edit
Step 1: Open the Adobe Photoshop 7.0 by double-clicking on the icon and Create a "New" layer with "1920 by 1080 dimensions" and keep "Resolution to 150" and then click "OK".
After clicking "OK", then it looks like the below screen shot.
Step 2: Now select the "Text" tool in the tools panel
You can additionally make changes to your text in the text menu window positioned to the right beside navigator window.
Step 3: Open the image to insert in the text by clicking "Ctr+O" and put that image layer above the text layer as shown in the below screen shot.
Step 4: It's Time for clipping the layers. Here, I clip both the layers with the shortcut "Ctr+G". It looks like the below screen shot.
Step 5: If you are not comfortable with the edit what you did till now then you can able to change that by changing the image position and its size inside text. To do that left-click on the image layer in layers window and select "Move" tool in Tool panel and then Transform the image by applying the shortcut "Ctr+T" and re size the image in your own way. I have re sized and fixed like this as shown in the below screen shot.
If you observe in the above image there is no difference outline of the text and the background. They were merged in colour. So I would like apply the "Blending options" for the text layers as in the below screen shot.
If you observe in the above screen shot, keep tick marks for drop shadow and Stroke in the blending options menu and you can also apply additional effects to that which are available in blending options window. I have applied only the two as specified earlier and the result looks like image at the right side of the blending options window.
You can also change the background of image and I have edited it according to my taste. The final result of my edited image is shown below.
This is one type of editing and you can also apply some brush strokes to edit in a more classy way. For any queries feel free to discuss. We will discuss about them in the later on tutorials.
This editing has been dedicated to the Cricket fans all over the world.
Happy editing..!


Comments
Post a Comment