Water Dispersion effect
In the last tutorial, we had discussed about the Pixel explosion effect. It is also a type of effect in which you can apply more edits as i already stated "There are no limits for editing with photoshop".
Okay.. let's move on to next tutorial which is "Water dispersion effect".
Water Dispersion effect is similar to the Pixel explosion effect but the change is that there will be a very small and finest particles that disperse and it is applied to the image. As usual, let's discuss with an example..
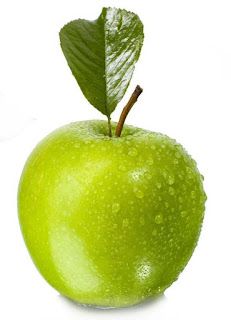
My example image is given below..
Step 1: Open the above image in Adobe photoshop 7.0 by clicking "Ctrl+O".

Step 2: Use "Magic wand tool" and left-click one time on the white background in the
image and then invert the selection by clicking "Shift+Ctrl+I".

Apply selection with "Magic Wand tool".


Inverted selection.

Step 3: Now use "Drag & Move tool" to move the object(Apple) into a "New(Ctrl+N)" layer with dimensions (1600x1450) as shown below.

Step 4: Create "layer mask" for the object(apple) in new layer and erase the down portion of it with "Erase tool" (soft round eraser with opacity 30%) as shown in the below screen shot.


Step 5: Now add "Hue/saturation" to it with values as shown in the below screen shot and Create "Clipping mask using shortcut(Ctrl+Alt+G)"..

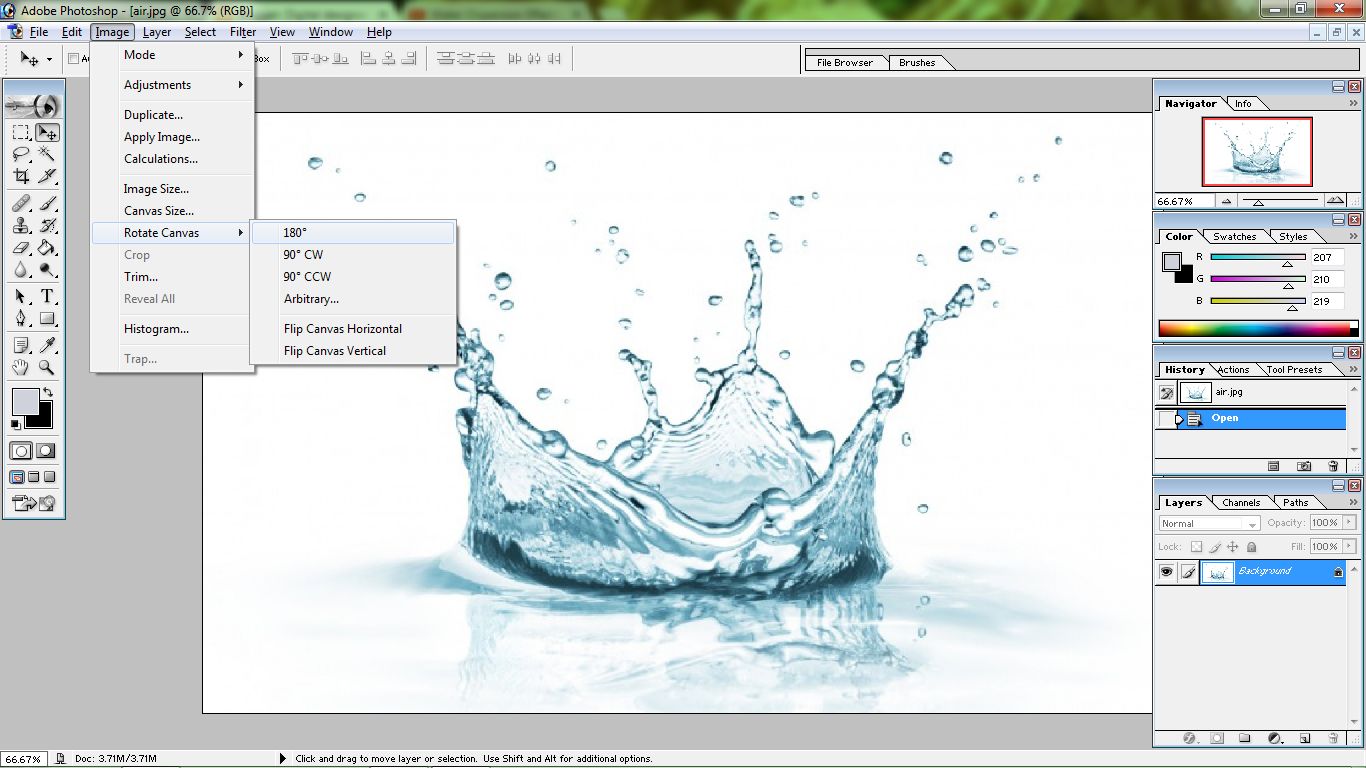
Step 6: After doing that, open water effect image as shown below in Adobe photshop 7.0 and repeat steps 2 & 3
Image:

Open the above image in Adobe photoshop 7.0
Inverted image.

Again use "Magic wand tool" and inverse the selection (Ctrl+Shift+I).

"Drag & Move" selected portion of image to first layer

Step 7: Now, go to "Edit" and "Transform" and then select "Perspective(for photoshop 7.0 version)". edit the image as shown below.

Step 8: Again create "Layer mask" for it and then apply "Hue/saturation". Now create "Clipping mask (Ctrl+Shift+G)" as shown in the below screen shot.

Apply "Hue/saturation"

Create "Clipping mask(Ctrl+Shift+G)"

Step 9: "Save(Ctrl+S)" the final result in your desired folder. The Image is shown below.

This effect is quite complex, feel free to discuss about any queries.
Happy editing..!
Okay.. let's move on to next tutorial which is "Water dispersion effect".
Water Dispersion effect is similar to the Pixel explosion effect but the change is that there will be a very small and finest particles that disperse and it is applied to the image. As usual, let's discuss with an example..
My example image is given below..

Step 1: Open the above image in Adobe photoshop 7.0 by clicking "Ctrl+O".
Step 2: Use "Magic wand tool" and left-click one time on the white background in the
image and then invert the selection by clicking "Shift+Ctrl+I".
Apply selection with "Magic Wand tool".
Inverted selection.
Step 3: Now use "Drag & Move tool" to move the object(Apple) into a "New(Ctrl+N)" layer with dimensions (1600x1450) as shown below.
Step 4: Create "layer mask" for the object(apple) in new layer and erase the down portion of it with "Erase tool" (soft round eraser with opacity 30%) as shown in the below screen shot.
Erasing the down portion of object.
Step 6: After doing that, open water effect image as shown below in Adobe photshop 7.0 and repeat steps 2 & 3
Image:

Open the above image in Adobe photoshop 7.0
Inverted image.
Again use "Magic wand tool" and inverse the selection (Ctrl+Shift+I).
"Drag & Move" selected portion of image to first layer
Step 7: Now, go to "Edit" and "Transform" and then select "Perspective(for photoshop 7.0 version)". edit the image as shown below.
Step 8: Again create "Layer mask" for it and then apply "Hue/saturation". Now create "Clipping mask (Ctrl+Shift+G)" as shown in the below screen shot.
Apply "Hue/saturation"
Create "Clipping mask(Ctrl+Shift+G)"
Step 9: "Save(Ctrl+S)" the final result in your desired folder. The Image is shown below.
This effect is quite complex, feel free to discuss about any queries.
Happy editing..!


Comments
Post a Comment