Coloured pencil effect

In the last tutorial, we have discussed about the Inserting an image in text. It is a simple way and one of the type of edit done by most of the designers. I would like to tell you all that, there are no restrictions for editing in any type of editing you do. Based on your taste and your point of view, the pictures get new effects. I have already did a number of edits on so many number of pictures. Whenever, I finish the basic tutorials for you I will post you detailed description about my editing with applications. Stay tuned...
Okay, Let's move on to the tutorial. In this tutorial, I'd like to tell about the Coloured Pencil effect which resembles like a drawing with colour pencils. Follow the below steps to complete the application of effect on an image.
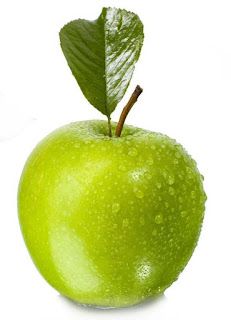
My example picture in this tutorial is shown below.

Step 1: Open the picture in Adobe Photoshop 7.0 software.

Step 2: Click on the background layer and unlock it. Then it appears as "layer 0" . Now duplicate the layer 0 by clicking "Ctrl+J". It is a shortcut for duplicating the layer. And then select only the background with "Magnetic Lasso tool".
To do that, first I selected the object in the image and inverted my selection by clicking "Shift+Ctrl+I". So that only background is selected.
We selected the background to blur it. So that after applying the effect it appears as a clean white background without any black coloured shades.

Step 3: I have selected the object in the image as shown in the above screen shot. Now, I invert my selection to select the background by clicking "Shift+Ctrl+I".


Step 4: Now blur the selected portion by clicking the "Filter" option in menu bar and go to "Blur > Gaussian Bur".


Click "OK"
Step 5: Now De-saturate the layer as i already discussed in the previous tutorial of desaturating of an image. Shortcut for De-saturate "Shift+Ctrl+U".

"Darken" the layer as shown in the below screen shot.

Step 6: Duplicate the layer and invert it by clicking "Ctrl+I".


Step 7: Now make a blending change for that layer by selecting "Color dodge" as shown in the below screen shots.


Step 8: Now filter the image by clicking on the "Filter", go to "Other" and then select "minimum" as shown in the below screen shots.


Click "OK".
Step 9: Now again duplicate the first layer i.e, "Layer 0" and move it to the top of all the layers. For that layer apply the blending change as shown in the below screen shots.


Step 10: Save the final result of the edited image. The image is shown below.

That's it!
We are done with the editing and enjoy the new editing tutorial. For any queries feel free to discuss.
Happy editing..!


Comments
Post a Comment