How to change background
In the previous tutorials, we have discussed about the intro about the Adobe photoshop 7.0 and the tool used in it. Now, let's move on to the effects that we can apply to the images using the software. There are a numerous and so many variety of effects that a designer can apply. The effects are created by the designer on his own interest and creativity. In this blog, we will cover the effects and edits one by one done by most of the designers. In other words, we can specify them as a basic edits that a beginner should know to become a professional designer. In the earlier posts, we have a given a quick glance about the tools and discussed in detail about some of them and some are left just as a glance this is because they can be better understood while applying effects. So for the better understanding purpose we decided to explain them in a practical way.
Okay...now in this tutorial we will about the changing of background of an image in Adobe photoshop 7.0. There are so many methods to do this, every designer has their own way. Let us have a look at one of them.
Here I like to change the background of most popular actor "Rock" his image is show below.

the above shown image is used for applying the effect.
Step 1: Double click on the Adobe Photoshop 7.0 icon and open it. Then this window will appear as shown in the below screenshot.

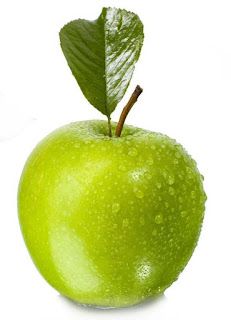
Step 2: Now click on "File" in the 'Menu' bar and then click on "Open(ctrl+O)". In this way open your image for which you would like to apply the effect. And I chose this image as shown in the below screenshot.

Step 3: Now click on the selection tool. You can use any type of selection tool for selection purpose. Here I use Magnetic lasso tool for selection. By clicking on that tool you can access the tool. Now start selecting the portion which you wold like select and the result is as shown in the below screenshot.

Step 4: Now copy the selected portion of the image and paste it in a new image in which you would like to have background. You can adjust the size of the selected portion by transforming its size (Ctrl+T). And the image looks like the below screenshot.

Step 5: The final image with background change is shown in the above screenshot. Now to save the picture by clicking on the "File" and then click on the "Save as.." and select the format in which the picture to be saved.


Okay...now in this tutorial we will about the changing of background of an image in Adobe photoshop 7.0. There are so many methods to do this, every designer has their own way. Let us have a look at one of them.
Here I like to change the background of most popular actor "Rock" his image is show below.
the above shown image is used for applying the effect.
Step 1: Double click on the Adobe Photoshop 7.0 icon and open it. Then this window will appear as shown in the below screenshot.
Step 2: Now click on "File" in the 'Menu' bar and then click on "Open(ctrl+O)". In this way open your image for which you would like to apply the effect. And I chose this image as shown in the below screenshot.
Step 3: Now click on the selection tool. You can use any type of selection tool for selection purpose. Here I use Magnetic lasso tool for selection. By clicking on that tool you can access the tool. Now start selecting the portion which you wold like select and the result is as shown in the below screenshot.
Step 4: Now copy the selected portion of the image and paste it in a new image in which you would like to have background. You can adjust the size of the selected portion by transforming its size (Ctrl+T). And the image looks like the below screenshot.
Step 5: The final image with background change is shown in the above screenshot. Now to save the picture by clicking on the "File" and then click on the "Save as.." and select the format in which the picture to be saved.
Final picture is shown in the below screenshot.
Yeah we did it...
In this way, we can change the background of any image and create your own based on your creativity. Here, I failed to keep a clarity picture but one can find a good picture and change the background you can get a better result. Hope you like this tutorial and we will discuss like these tutorials in the coming days please follow the blog for more edits and effects like this.


Comments
Post a Comment